About General Surveys
We understand that you need the flexibility to create surveys that don't fit into the other survey types we provide. For that reason we have created a generic survey type that you can configure in anyway you like.
We have a range of question types including:
- Comment Boxes
- Date Entry Fields
- Drop Down Lists
- Multi-line Textboxes
- Multiple Choice (Multi Answer)
- Multiple Choice (Single Answer)
- Single Line Textboxes
- Rating Scales
We've made these surveys incredibly easy to run, just follow these simple steps to get started.
-
1. Create The Survey
-
2. Select Questions
-
3. Decide How To Deliver The Survey
-
4. Review & Start The Survey
-
5. Collate The Responses
1. Create The Survey
- All our surveys have optional start and end dates. If you enter a start date, then no feedback can be provided until that date. Similarly, if you enter an end date then no feedback can be provided after that date.
- You can provide some instructions or an introduction which will be displayed to all people providing feedback.

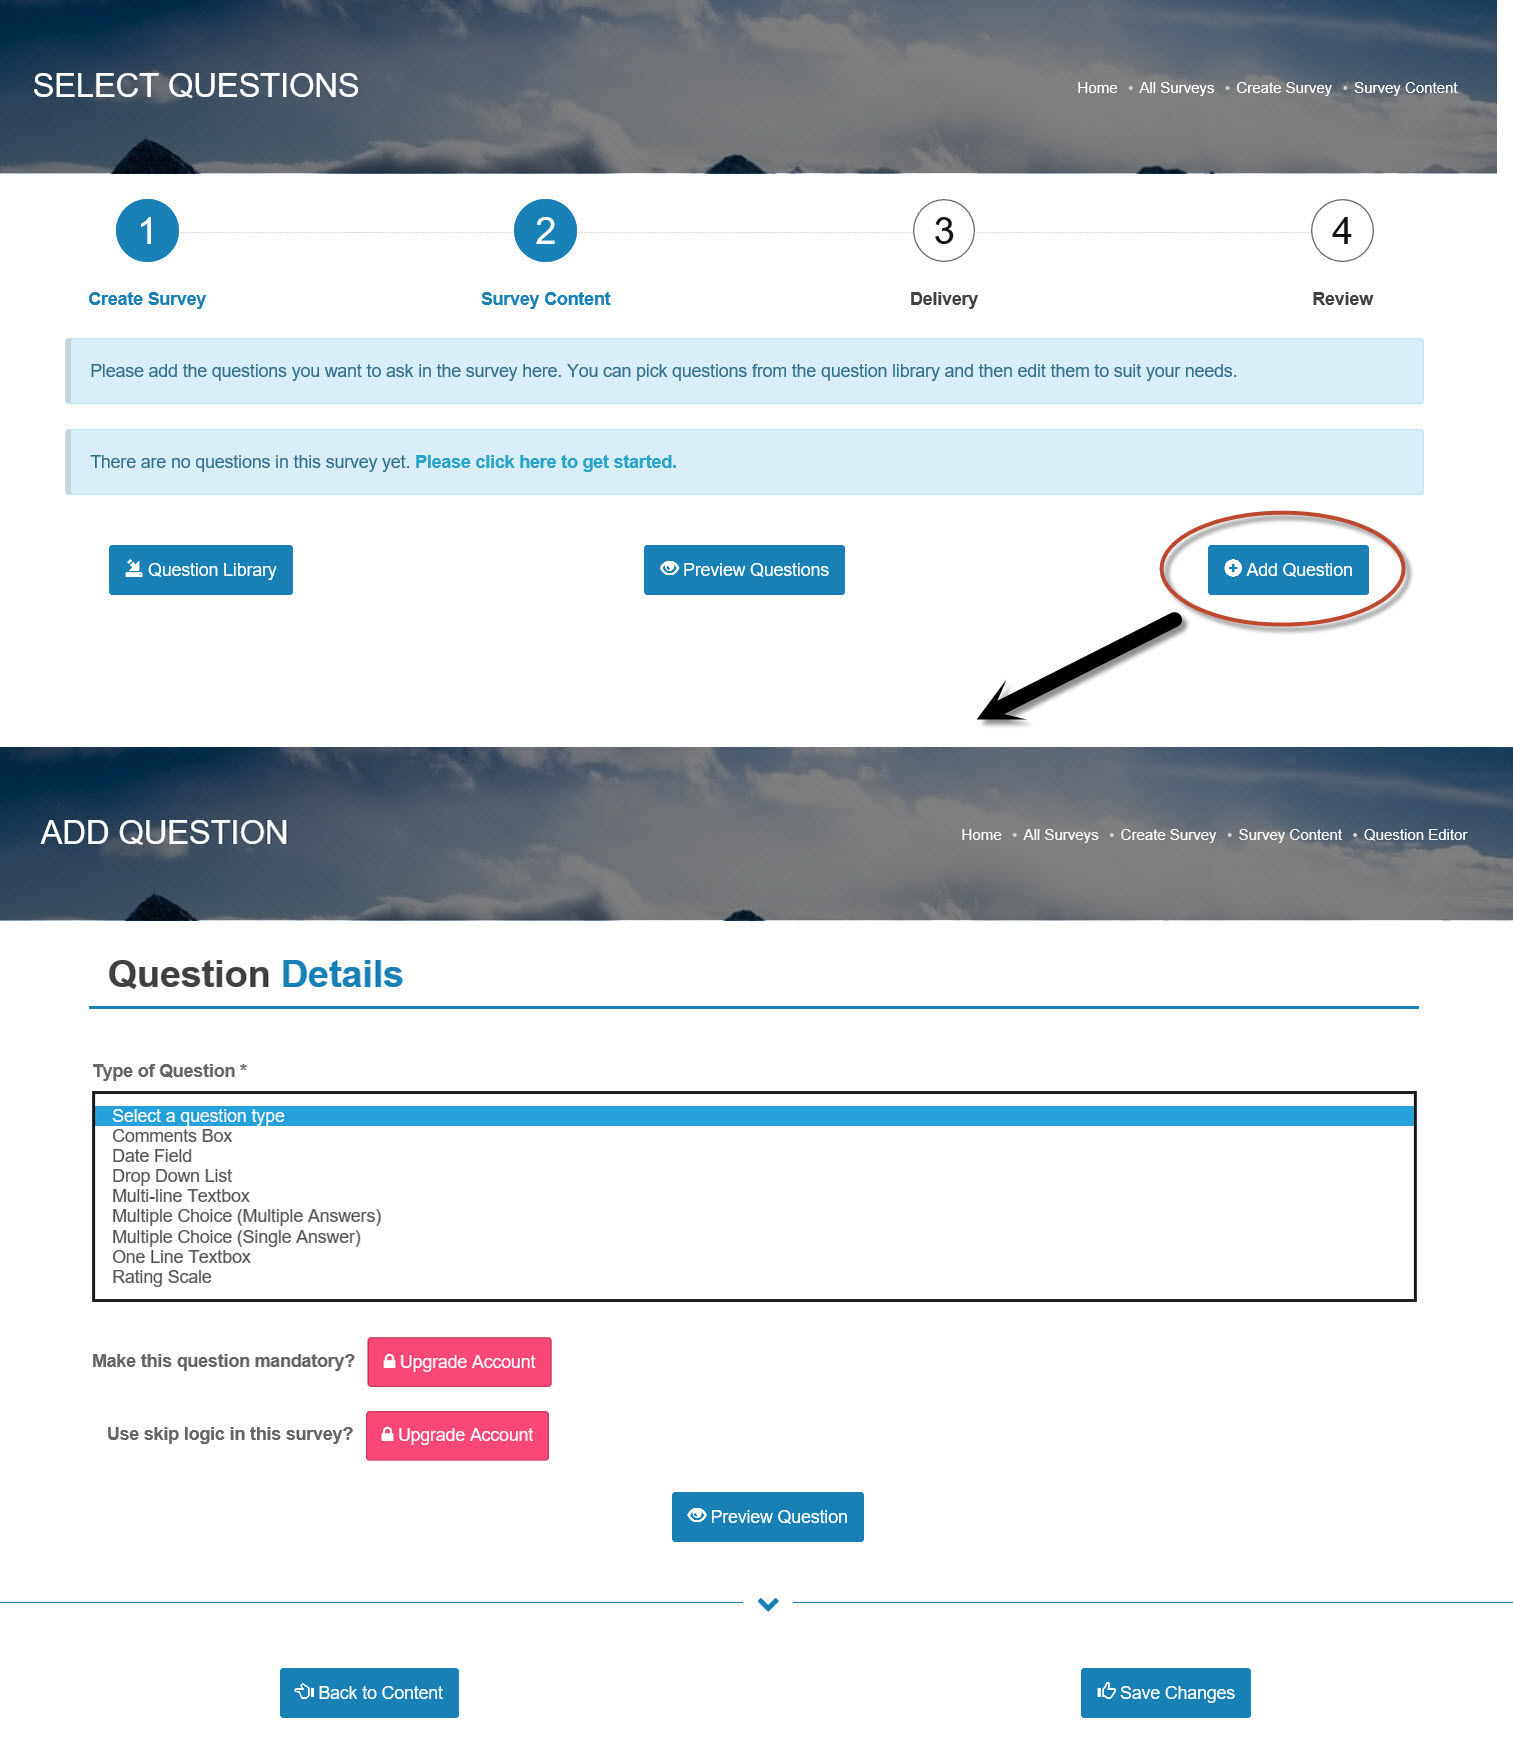
2. Select Questions
- Select the questions you would like to ask in your survey.
- Clicking on Add Question will take you to a question editor page. Here you add any type of question we offer. You can also preview what the question will look like once in a survey.
- The Preview Questions feature on this page is a powerful tool when building the survey. It lets you see what the questions will look like in the survey, including using any fonts or images that you have setup for your organisation.
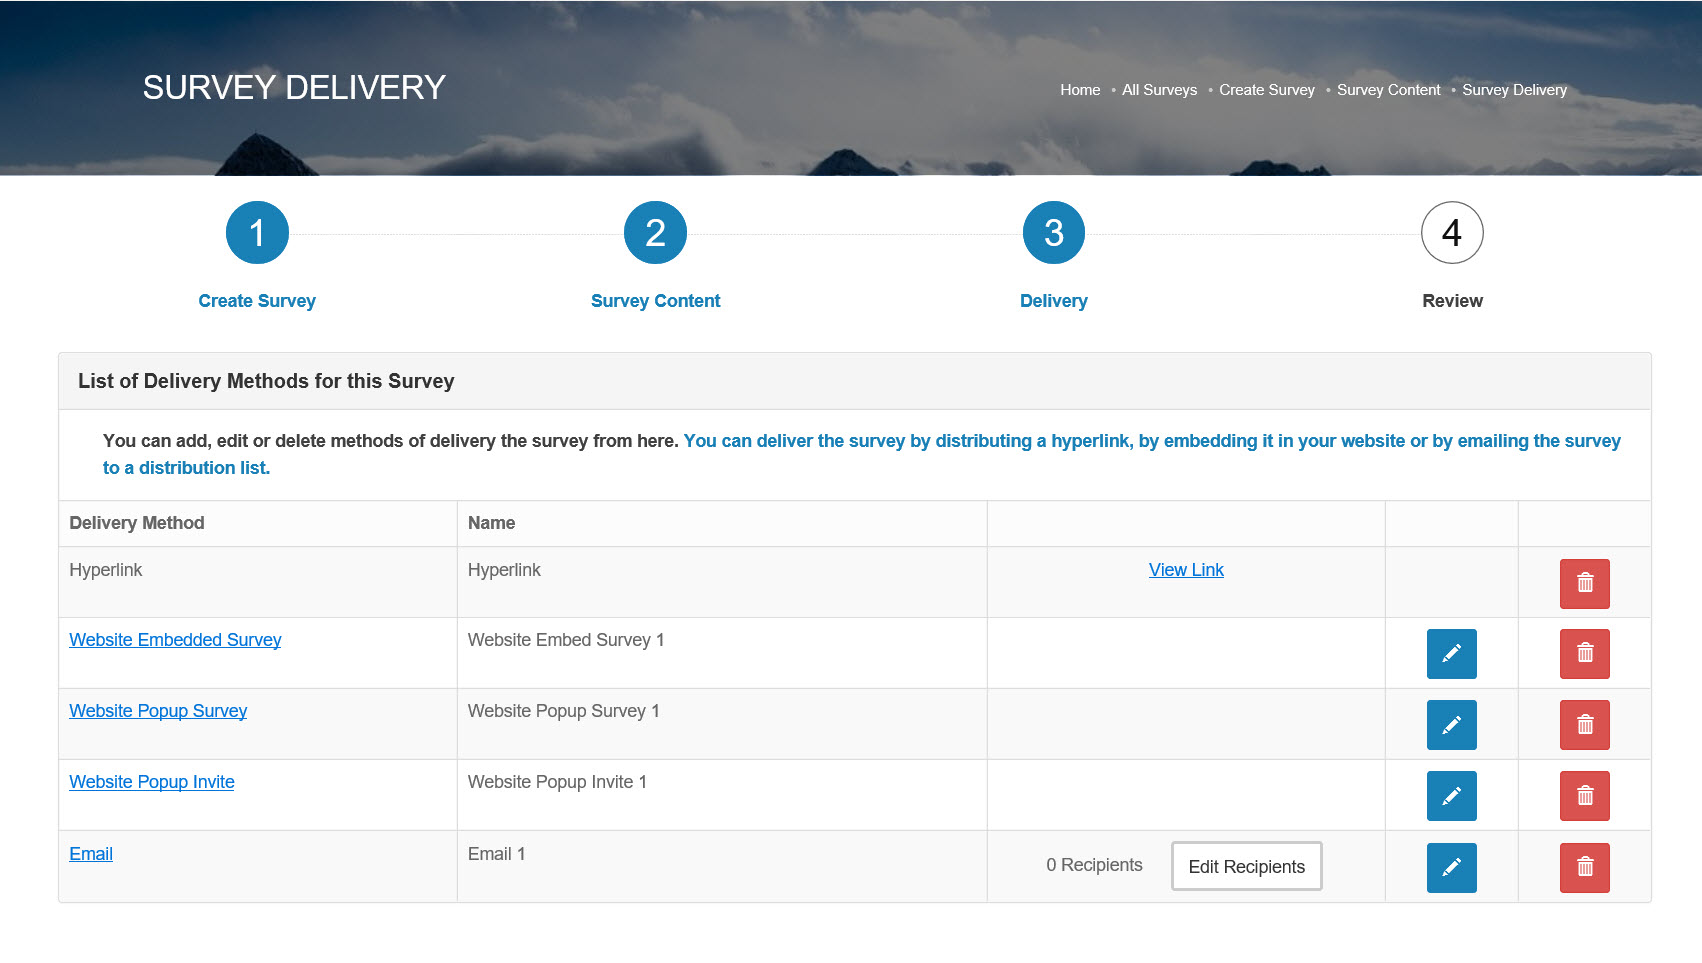
3. Decide How to Deliver The Survey
-
There are currently five ways to deliver a survey.
- Hyperlink - that you then share
- Email - you can configure everything about the email
- Popup Invite - you then include the invite on your website. Users are then directed to the survey.
- Popup Survey - the survey appears on your website as a popup. Users can then take the survey whilst on your website.
- Embedded Survey - you embed the survey into your website. Users can then take part in the survey whilst on your website.
- You can have any combination of these delivery types. You can even build different version of the same method, e.g. different emails going to different groups of people.
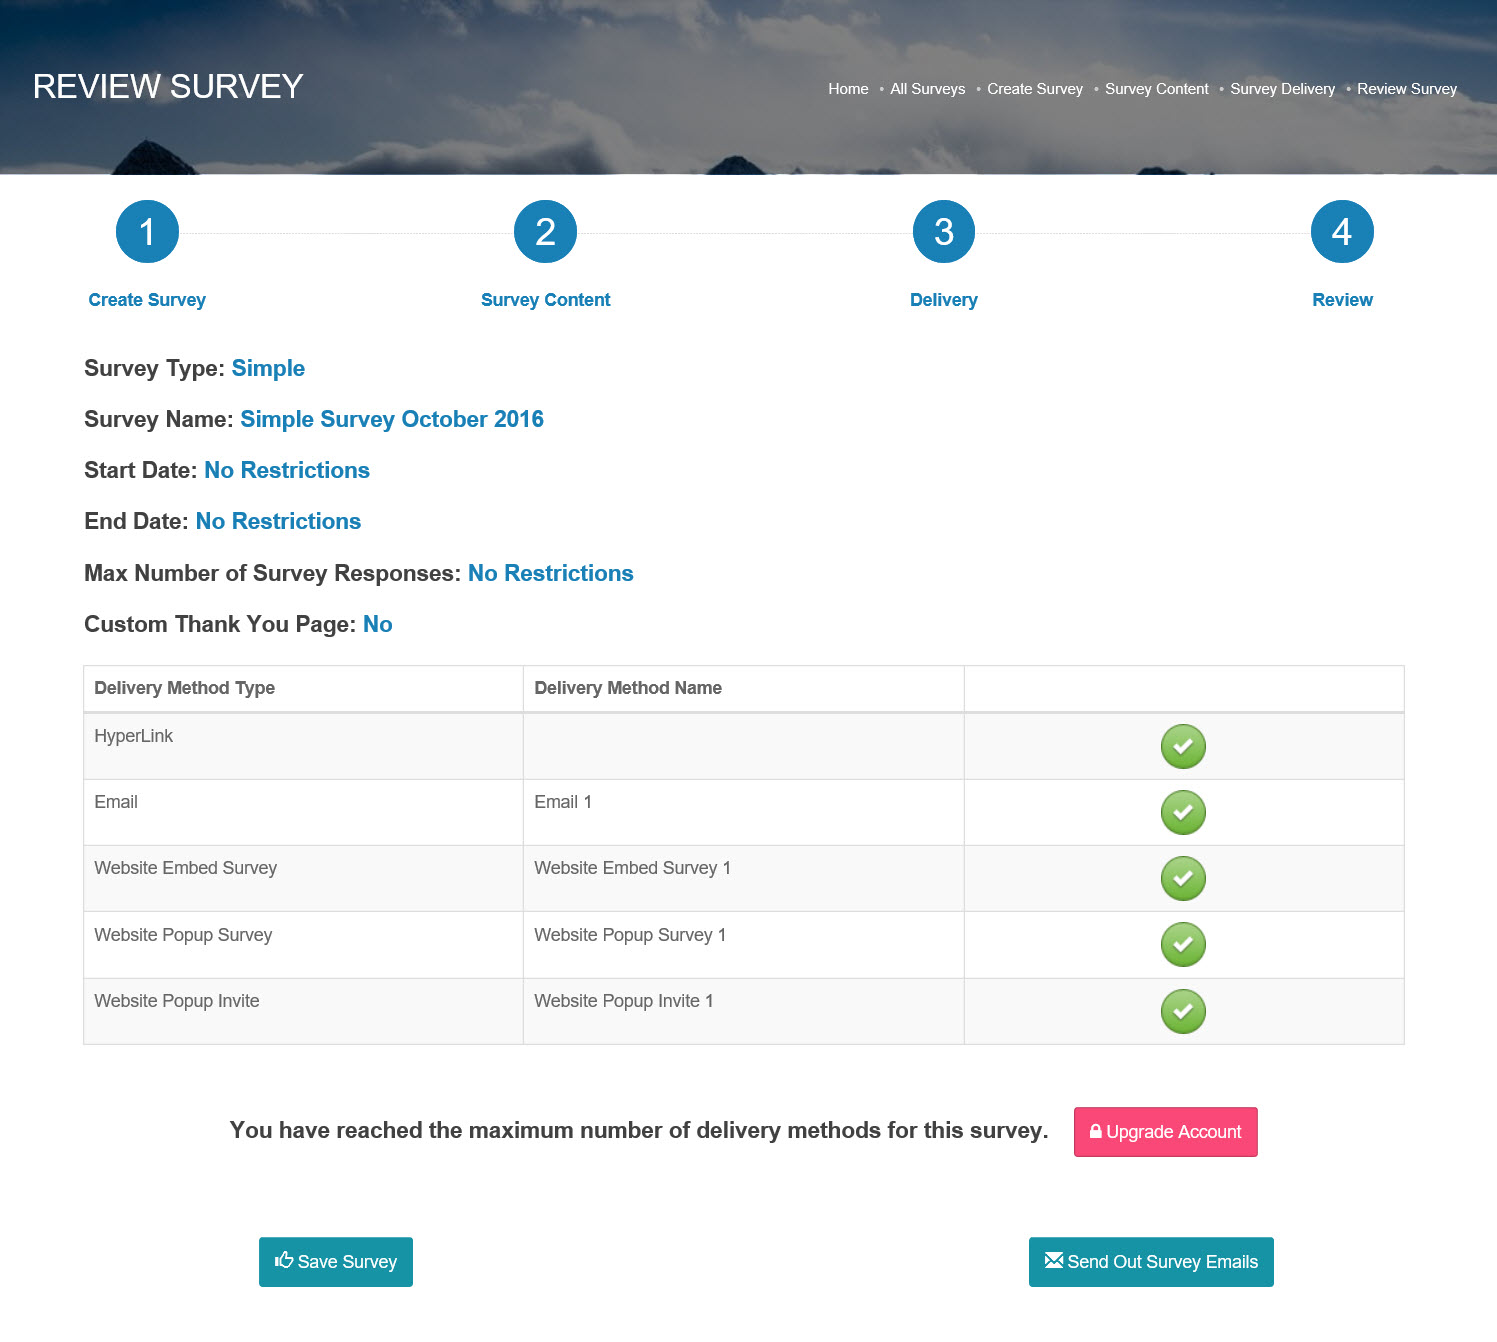
4. Review & Start The Survey
- The final stage of creating a survey involves quickly reviewing how you have set it up, just to make sure everything is in order.
- The system will tell you if there are any errors in the setup and prompt you to correct them.
- If you are happy with the survey but don't want to start it just yet then simply save your changes. You can then come back to this screen when you are later.
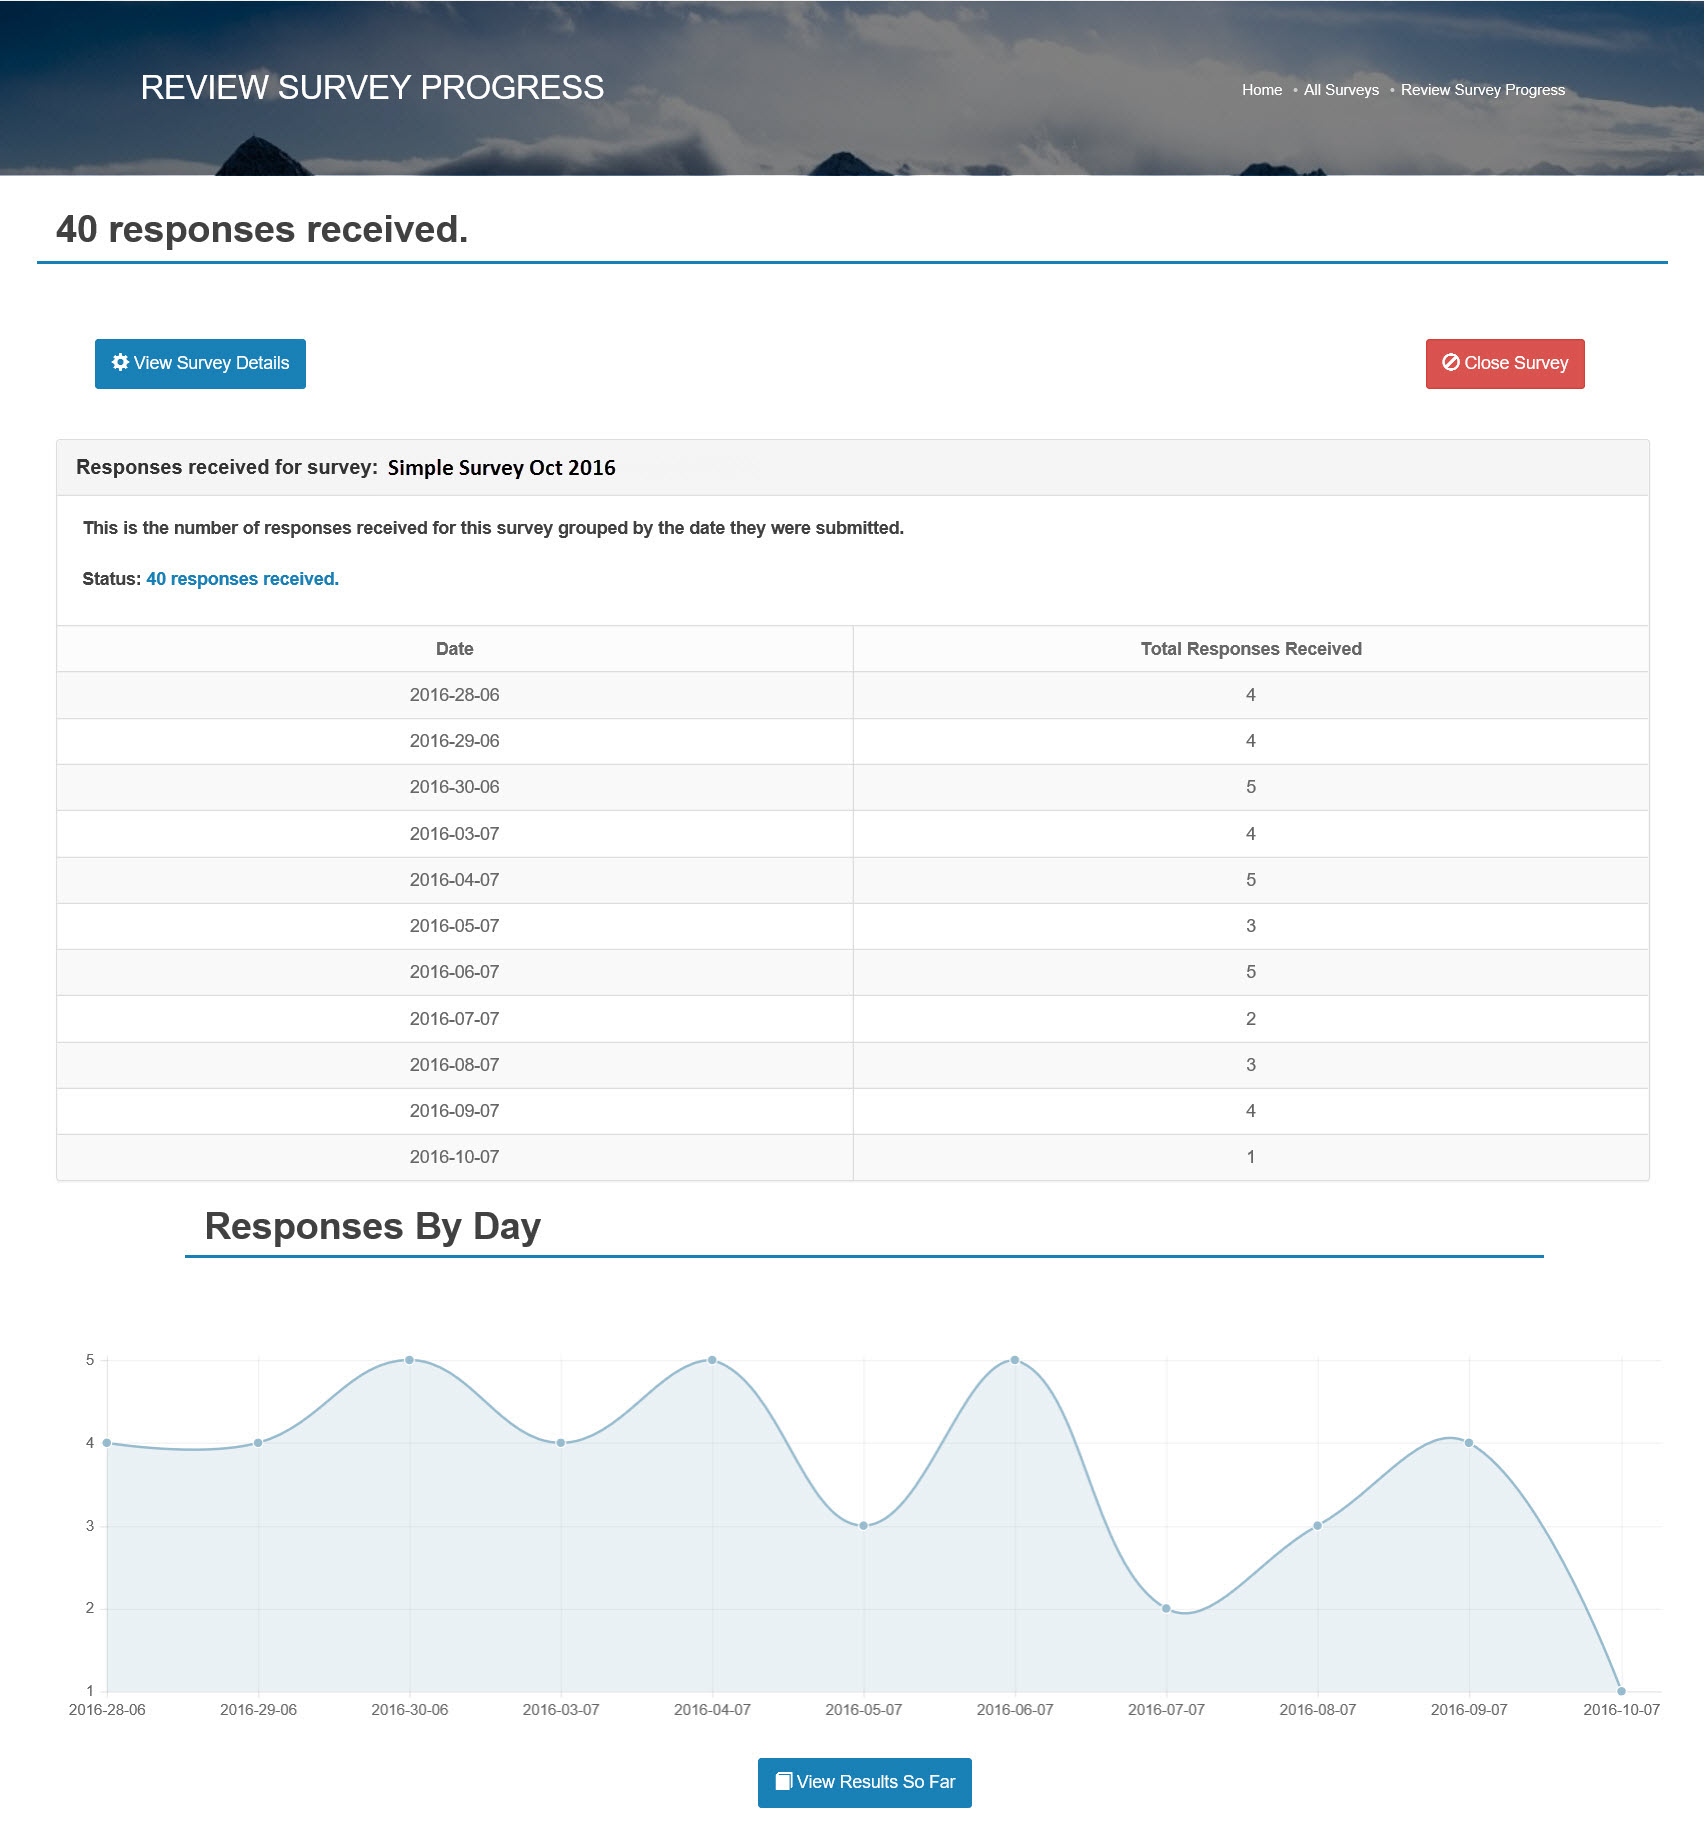
5. Collate The Responses
- You can see a running total of how many responses you are receiving.
- If you have enough responses then you will see a chart showing the trend of when responses have been submitted.
- At any given time you can check the results so far.